Congrats – You figured it out! Saving time and money in the garage is always a win-win. So today we are going to talk about your new golf cart battery watering system you just purchased and how to install it. The image below will show you the basic kit you would have received. The number of battery valves may vary based on the size of your battery bank, but all other components should be included. Valves, tubing, tees, end caps, and hand pump.

Lift the seats out
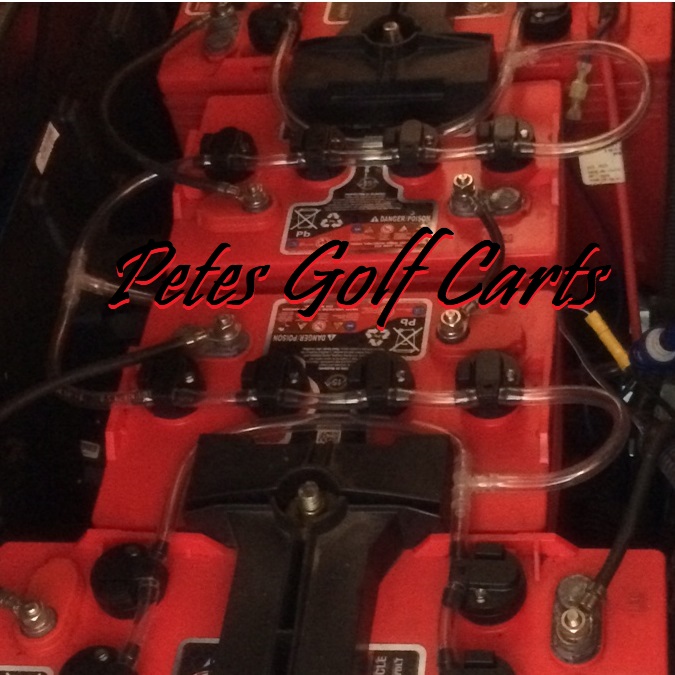
Let’s start off by lifting the seat off the golf cart in question and throwing it over the roof. This is the easiest place to get it out of your way and keep it from getting dirty or scuffed on the pavement. The images we will be showing herein are from a late model Club Car comprised of (6) six – 8 volt golf cart batteries. See image below.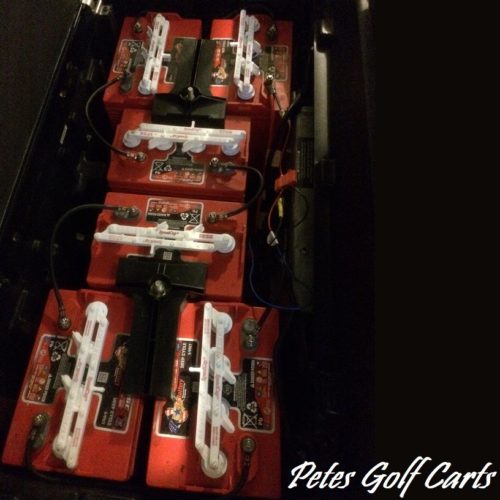
Wash down
Now you can either get the hose out and spray off all the dirt and junk on your batteries or wipe off with a rag prior to installing the new watering system. Pete always cleans things prior to working on them and cleans as he goes. Makes the job a little more enjoyable if you are not getting really dirty or getting battery acid on you or your clothing. This image shows the new 8 Volt US Battery with Speed Caps. Not all batteries come with this cap system so yours may vary. The Golf Cart Battery SpeedCap is an alternative to a watering system by cutting down on time to check and fill a battery because in one twist of the wrist you can access (4) four cells instead of individually.
Remove caps
Next you will remove all the battery caps or speed caps from your batteries. Make sure nothing falls into the battery cells while exposed and open.
Valves
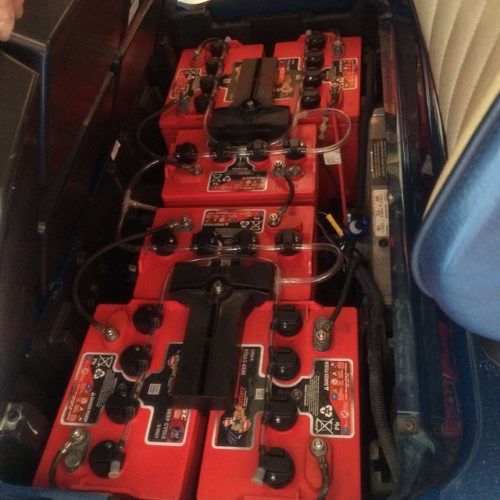
Once that is done you can start from left to right or top to bottom and pop in a few of the valves provided in the battery watering system kit. Do not pop all of them in just yet, just two to get a good measurement. Then you will want to measure the distance between the two valves’ connecting nipples. I usually just eye it up with the tubing in my hand and snip the pieces off with a sharp pair of scissors. You can also start a little assembly line and cut all the pieces joining the valves at once with a good measurement. Count the valves in your system and the required tubing to connect them together. I prefer the former because if I do each connection I will get a perfect fit every time as some of the valves will be twisted to a different angle to keep the tubing in a nice bend or curve without kinks or restrictions.
Connection Point
Once you have completed that task look at the lay-out of your battery bank and plan to place the one point connection for the watering system in the middle of the batteries to water. Example – 36 Volt System with 6x 6 volt batteries. The one point connection should fall between the bank of 6. Three batteries to the right and three batteries to the left. Or in this case 6x 8 volt batteries. Just by looking at the battery configuration illustration you will be able to determine quite easily the placement for the one point connection. Whether you are using a hand pump or gravity feed tank.
Help is on hand
Pete’s team have decades of experience with golf carts and all manner of batteries for electric vehicles. Simply get in touch for guidance on purchasing and maintenance.